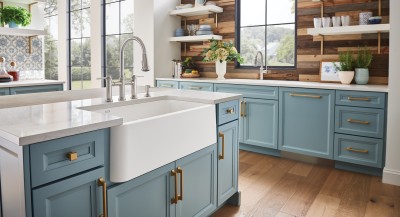
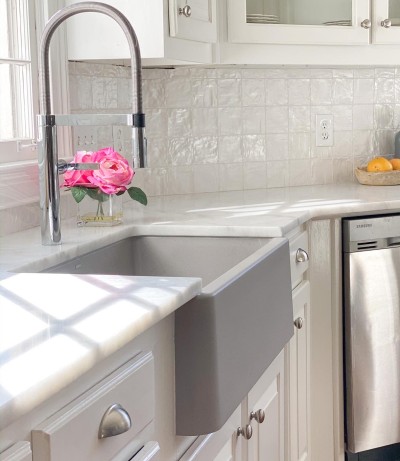
World Baking Day is Sunday, May 17th. Every year, home bakers from around the world pledge to bake goodies for someone special in their lives – whether it’s their neighbor, a grandparent or a teacher. This year may look a little different as we’re all hunkering down at home, but you can still celebrate with your loved ones. Turn this delightful day into a family affair by getting your entire household involved. With a white farmhouse low-divide sink, prepping your ingredients and getting your sweets into the oven can be faster and easier than ever.
Mise en Place
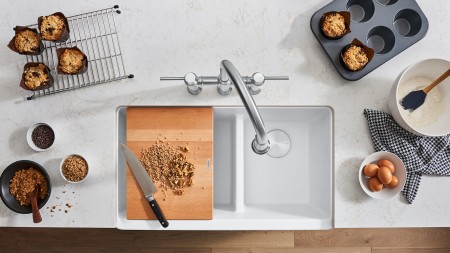
A good rule of thumb for any home baker or chef is to practice “mise en place” before you start your recipe. This French culinary phrase means “everything is in its place,” for quick and effortless baking. For example, all ingredients should be pre-measured in individual prep bowls and knives should be cleaned and sharpened. Any additional tools, such as whisks or cutting boards, should be out on your countertop, ready to go.
If you have a BLANCO IKON® white farmhouse sink, you can transform your sink area into a functional prep space with a custom floating cutting board. The way this farmhouse sink is installed also provides a more ergonomic set-up by bringing the sink closer to you, so you can tackle food preparation at your sink with less strain on your back.
/3-4-402324-ikon-33-175-low-divide-wh---tgl1-web-image-450w-253h.jpg)
Just Crack an Egg
Once everything is in its place, it’s time to get cracking – literally! For easier cleanup, crack your eggs on the side of your sink. You won’t need to worry about wiping up messes on your counter because our IKON® white farmhouse sinks are made of SILGRANIT and are manufactured at our North American facility in Toronto, Canada.
SILGRANIT is a durable and patented granite composite material exclusive to BLANCO that’s super easy to clean. Sticky or messy baking substances, like egg whites, can be quickly wiped away with a sponge or easily rinsed down the drain with one of our powerful faucets.
/3-4-402324-ikon-33-175-low-divide-wh---tgl2-web-image-450w-253h-1.jpg)
Ergonomic Design
With a farmhouse low-divide sink, prepping your ingredients and getting your sweets into the oven can be faster and easier than ever. If you have a white BLANCO IKON farmhouse sink, you can transform your sink area into a functional prep space with the help of smart ergonomic design.
The way this farmhouse sink is installed provides a more ergonomic set-up by bringing the sink closer to you, so you can tackle food preparation at your sink with less strain on your back.
/3-1-402324-ikon-33-175-low-divide-wh---ev1-web-image-450w-253h.jpg)
Clean it Up and Whisk it Away
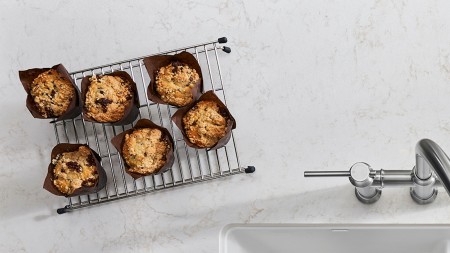
As you’re prepping, you may find yourself tossing dirty plates, spatulas, and whisks in the sink. SILGRANIT is heat-resistant and can withstand temperatures up to 280 degrees C / 536 degrees F, exceeding common baking temperatures. So, go ahead and put your hot baking sheet or muffin pan directly in the sink after loading up the cooling rack with your freshly baked treats!
The great thing about a farmhouse sink with two bowls is that you can toss dirty dishes in one bowl while leaving the other bowl clear for dishwashing. The low-divide design of our 33" IKON sink with its deep 9.25" bowl depth, makes maneuvering large baking sheets inside your sink a breeze during clean up. It's so roomy, you won't need to worry about excessive water splashing onto your countertop!
Multi-Task with a Cooling Rack
A BLANCO IKON® farmhouse sink comes with an optional floating grid as well. This custom grid is the ultimate multi-tasker that can work with you from start to finish. You can wash and drain fresh produce like blueberries or peaches to add to a muffin mix, create an elevated surface inside your sink to whisk eggs, or use the grid as a cooling rack for freshly baked goodies.
Are you still figuring out what to bake for World Baking Day? We can help get you started with a chocolate peanut butter cookie recipe from Old House to New Home!
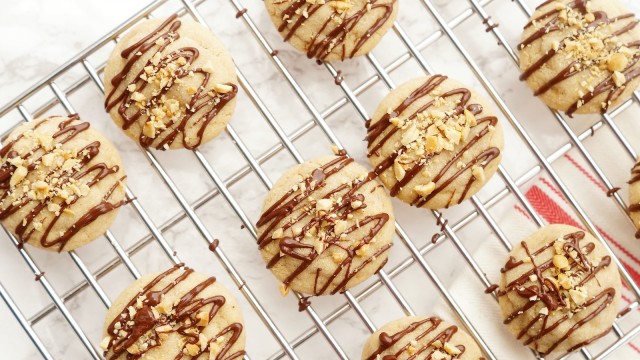
Peanut Butter Meltaway Cookie Recipe
Yield: 24 cookies
Prep Time: 10 Minutes
Cook Time: 9 Minutes
Ingredients:
- 1 1/4 cups flour
- 1/2 tsp baking powder
- 1/2 tsp baking soda
- 1/2 cup salted butter (1 stick) room temperature
- 1/3 cup peanut butter – do not use natural
- 1/2 cup granulated white sugar – plus more for rolling
- 1/2 cup brown sugar
- 2 tsp vanilla
- 1 egg – room temperature
- 2 oz semi-sweet baking chocolate square
- 1/4 cup of peanut butter
Garnish
- Chopped peanuts
Procedure:
- Preheat oven to 350 degrees and line a baking sheet with a silicone baking mat.
- In a medium bowl, whisk together flour, baking soda, baking powder. Set aside.
- Using a stand mixer, cream the butter and peanut butter together until well combined, and no lumps remain. Slowly, add the sugars and beat until creamy and smooth, about 3 minutes. Add in the egg and vanilla extract. Mix until combined.
- With the mixer on low, slowly add in the dry ingredients. Mix on low until all ingredients are distributed. Don’t overmix.
- Roll about 2 tablespoons of dough into a cookie dough ball. Roll in granulated sugar. Place cookies on a prepared baking sheet, about 2-inches apart.
- Bake the cookies for 9-10 minutes or until they are golden at the edges and just set. Don’t overbake; the cookies will set up as they cool. Remove from pan once set and place on a cooling rack.
- Once cookies are completely cool, add the chocolate drizzle. In the microwave, melt your chocolate in 20 seconds intervals until melted. Once melted, add peanut butter and stir well. Add mixture to a squeeze bottle.
- Drizzle chocolate over the cooled cookies. Add peanuts immediately. Let set, about 1 hour.
- Store in an airtight container for up to 4 days or freeze for 1 month.
Pro Tip: Always keep your cookies on the cooling rack until after you drizzle on the chocolate. The excess drips off and doesn’t puddle on your cookie. Place aluminum foil or parchment paper underneath and then just throw away when done.
Join the club.
Every month we’ll send you the latest kitchen design trends, kitchen reno tips, how-to’s and lots of ideas to inspire your next kitchen project. You’ll also get the inside scoop on our latest product innovations and new product launches!
/3-5-bcan-402324-ikon-33-175-low-divide-wh---tgl3-web-image-1280w-656h.jpg)
/ikon-33-low-divide-white-image-615w.png)
